The iPod Mini, once a popular portable music player in the early 2000s, has become increasingly rare in good condition. Many surviving units show heavy wear, and sourcing replacement housings has become a challenge. While some online sellers offer used housings in fair condition, brand-new housings are virtually nonexistent (or they were when i made this video, links to buy new housings at the bottom of the page). This scarcity inspired me to experiment with 3D printing as a modern solution for restoring the iPod Mini’s exterior.
Exploring the Idea of 3D Printing an iPod Mini Housing
Tools & materials (recommended)
- Digital calipers, notepad and camera
- FreeCAD (or other CAD software)
- Bambu Studio (or preferred slicer)
- 3D printer (0.4 mm nozzle recommended), PLA or PETG filament
- Fine needle files, sandpaper (220→1000 grit)
- Flush cutters, tweezers, small screwdrivers
- Double-sided adhesive tape or thin panel adhesive
- Replacement battery (correct spec), iFlash CF adapter + microSD (optional)
- Heat source for screen removal (low heat gun/hair dryer)
- Isopropyl alcohol and lint-free cloth
Safety: take electrostatic precautions, avoid shorting batteries, and work in a well-ventilated area when sanding or using solvents.
With a newly acquired 3D printer, i set out to design a replacement housing from scratch. Before starting, I searched design-sharing platforms like Thingiverse for existing models but found no suitable options for the iPod Mini. Interestingly, other iPod-related parts were available, including front plates for iPod Classic models and even replacement buttons.
This discovery reinforced the idea that a custom design would be necessary. To begin, I used calipers to carefully measure every dimension of the original housing, taking note of small but crucial details such as:
- Cutouts for the metal shield and battery wires
- Internal rails for button alignment
- Variations in thickness where plastic end caps are installed
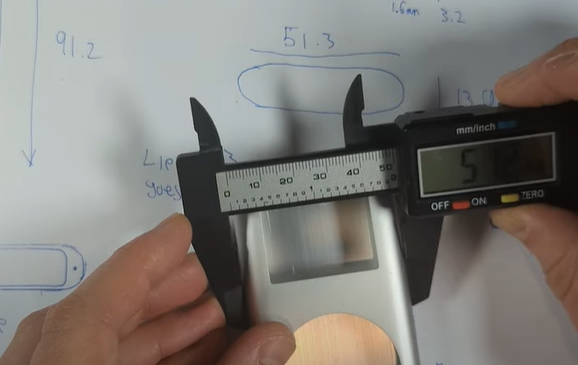
All measurements were then transferred into FreeCAD, an open-source CAD program, to build a precise 3D model.
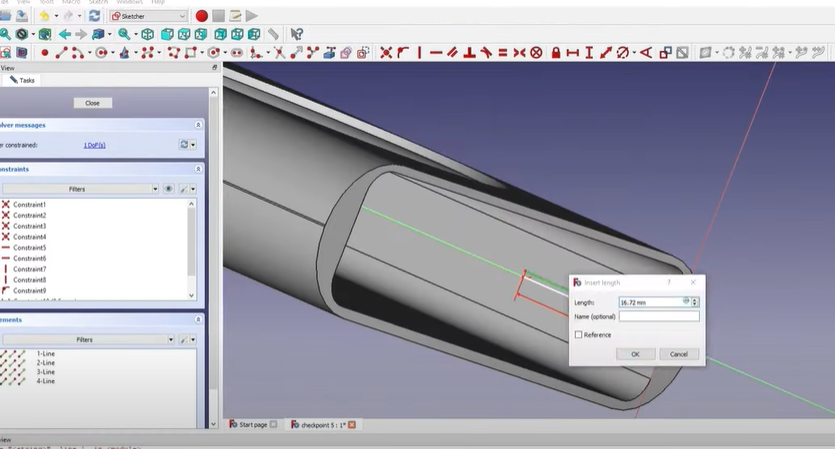
- Start a new project and set units to millimetres.
- Sketch the outer shell profiles and extrude to approximate thickness. Use parametric dimensions to allow quick changes later.
- Hollow the shell to create wall thickness (start 1.2–1.5 mm; increase in stress zones).
- Add internal features: screw bosses, button rails (separate sketches), screen bezel pocket, cutouts for shield and ports, battery wire channel and internal ribs for stiffness.
- Apply fillets to reduce stress concentrators and add small reinforcing pads under the screen and charging area if needed.
- Export as an STL
From Model to Print
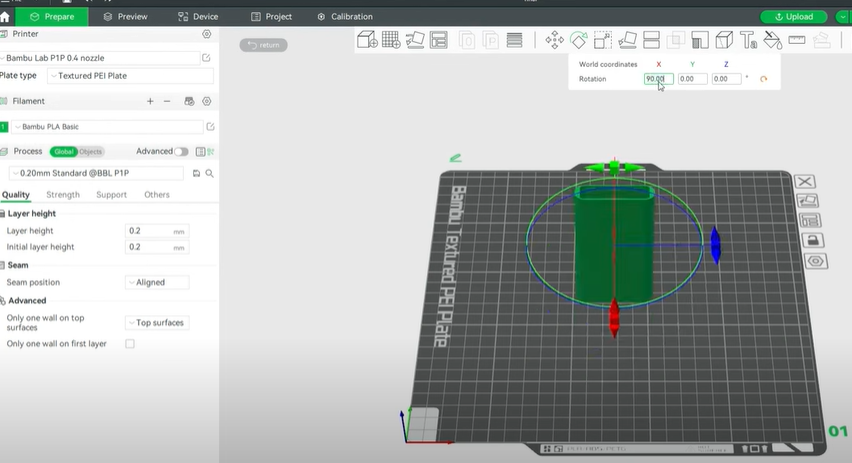
Once the design was complete, the file was imported into Bambu Studio, a slicer software used to prepare models for 3D printing. Several adjustments were made to optimize the final product, including:
- Layer height: Smaller layers for a smoother finish, at the cost of longer print times.
- Seam positioning: Adjusted to minimize visible lines on the final print.
Multiple test prints were produced to evaluate durability, accuracy, and aesthetics. Some early prints required filing around the click wheel cutout due to filament drooping, while others revealed that adding small adjustments—such as thicker outer walls—significantly improved strength and rigidity.
- Import the STL and orient the model with the back flat on the print bed (reduces internal overhangs).
- Test print settings (fast/low-res):
- Material: PLA
- Nozzle: 0.4 mm
- Layer height: 0.20 mm (test)
- Perimeters: 3
- Infill: 15%
- Nozzle temp: 200–210 °C, bed 55–60 °C
- Seam: Back or Random
- Supports: Targeted or none for the first test
- Slice and print the test piece.
Assembly and Upgrades
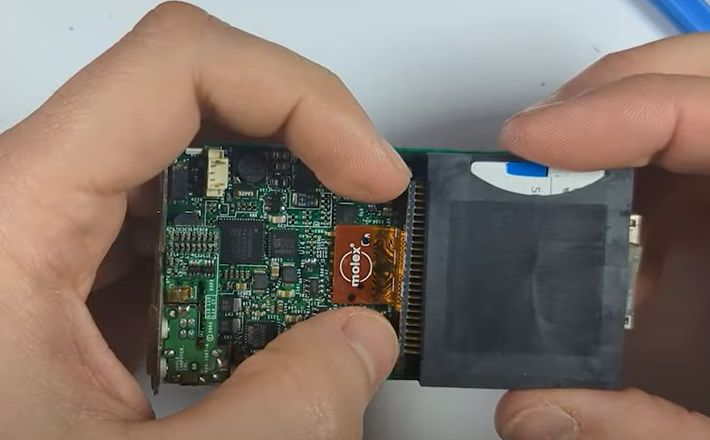
Disassembling the iPod Mini proved relatively simple compared to other models. After removing the top and bottom plastics, shields, and screws, the internal components slid out with ease. The original plastic screen cover was carefully removed with heat and tweezers, then reattached to the new housing with fresh adhesive.
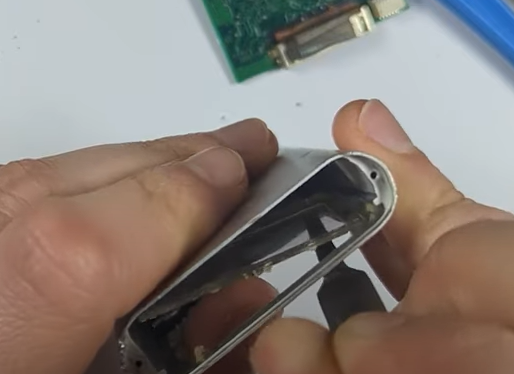
Buttons were transferred into the new case, fitting snugly with only minor adjustments. During reassembly, the opportunity was taken to upgrade key components:
- The original microdrive was replaced with an iFlash CF adapter paired with a 64GB microSD card.
- A new replacement battery was installed for improved longevity.
With these upgrades, the refurbished iPod Mini was lighter, sturdier, and better suited for modern use.
Testing and Refinements
Throughout the process, nearly 20 different prints were made to refine details like screen cutouts and button rails. Each iteration brought the design closer to a final product that balanced durability with a clean appearance. In particular, adding just 1.2 millimeters of thickness to the housing walls made the case feel substantially stronger while retaining its compact look.
The plastic housing also offered an unexpected advantage: it allowed wireless signals to pass through more easily, making it ideal for future Bluetooth modification projects.
Availability and Future Plans
The final 3D-printed housing proved successful enough to share with the wider iPod restoration community. I uploaded the STL files to Thingiverse for free which you can download here and announced plans to sell pre-printed housings for those without 3D printers here.
Looking ahead, additional parts such as replacement top and bottom plastic caps are planned, along with further modifications like USB-C charging and Bluetooth integration.
For enthusiasts looking to restore or upgrade their iPod Mini, 3D printing has opened a new path for customization and preservation. What once seemed like a relic of the past can now be revived with modern technology—breathing new life into a device that defined an era of portable music.