
Is your iPod Nano 2nd Gen failing to hold a charge? A sluggish battery doesn’t mean it’s the end of the road for your beloved device! With a quick and easy battery replacement, you can revive its performance and enjoy hours of uninterrupted music once again. Why toss it when you can fix it? This guide is your key to bringing back the beats and reclaiming the nostalgia. Let’s dive in and get your iPod Nano powered up like it’s brand new!
If you prefer a video guide you can follow along here:
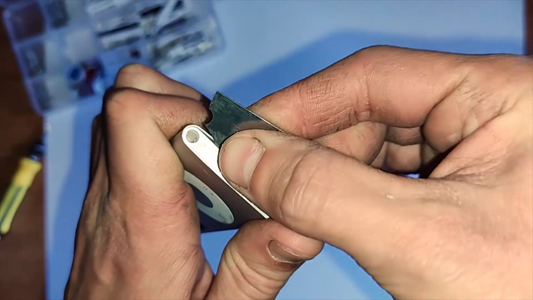
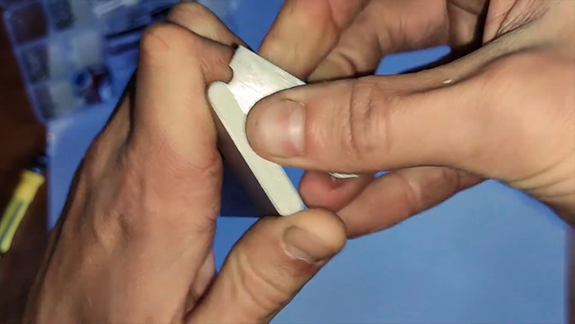
Step 1: Removing the Plastic Covers
To get started, you’ll need something to peel off the top and bottom plastic covers. I Prefer to use a dull box cutter blade or an exacto knife as you will be able to get them under the plastic with more precision, although an ipod opening tool or the plastic phone repair tools can work also. Gently insert the tool along the edges and work your way around to pop off the covers. Take your time to avoid any scratches or damage.
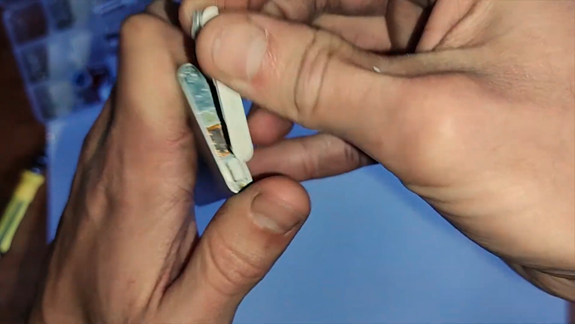
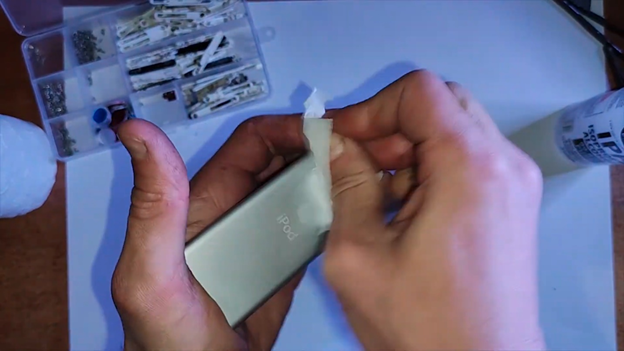
Step 2: Unscrew and Unclip with Care
Time to dig a little deeper! Start by removing the screws—there are two at the top and one at the bottom. Use a small Phillips screwdriver and keep those screws safe for later. Next, grab your tweezers and carefully pry out the metal plate at the top. Don’t rush; you want to avoid breaking the fragile flex cable.
Now, move to the bottom and gently pry out the plastic cover, but here’s the tricky part: the headphone jack is attached underneath. You will first need to slide the headphone jack forward, using your tweezers. Then insert the tweezers inside to unclip the connector. Go slow and steady to avoid damaging it.
Tip: It is important to use an appropriate sized screwdriver when working on small devices like this. If you use one that is to big or doesn’t have a nice enough handle you can end up stripping the screws. Luckily a mobile phone repair screwdriver kit with all the right bits can be had for only $10 – $20. Here is a link to buy one we recommend:
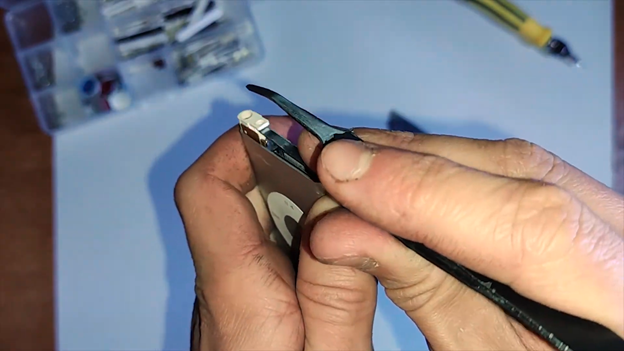
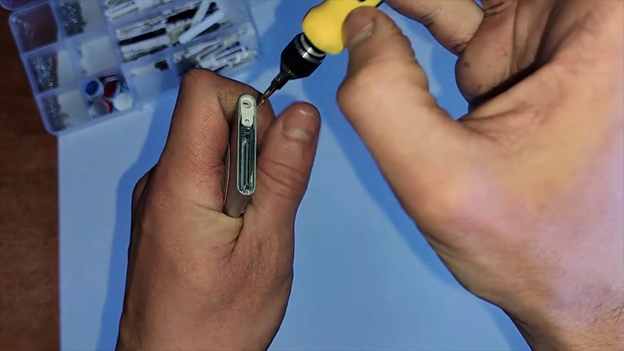
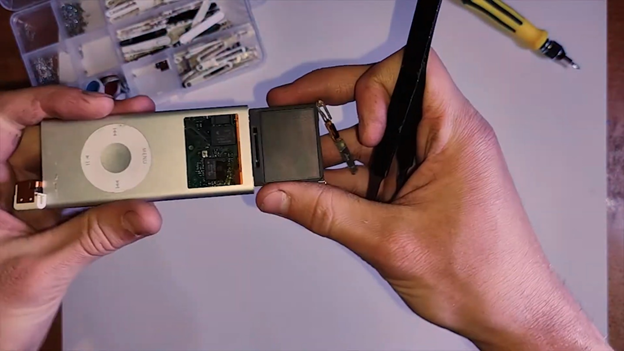
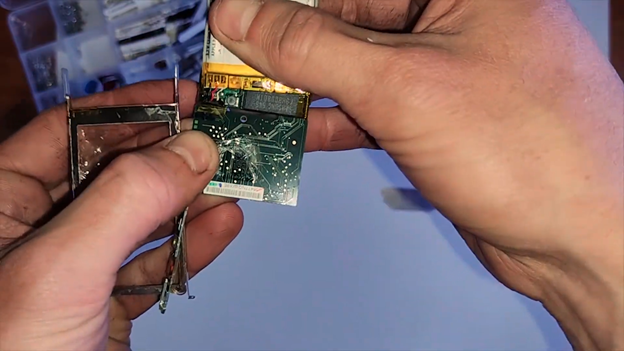
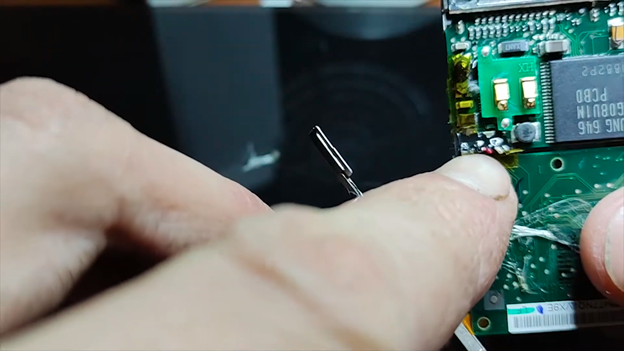
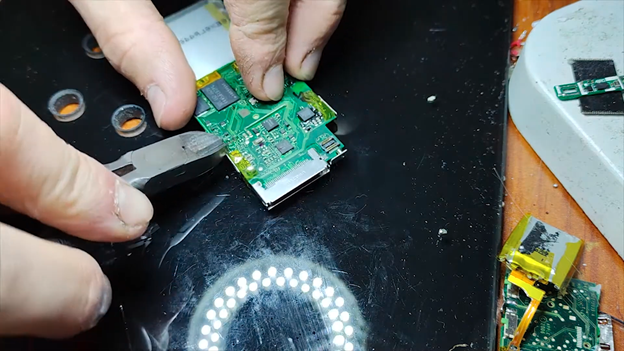
Step 3: Push with Precision
In this step, positioning is everything! Take a look at the picture to see exactly how to place your tweezers. Carefully position them and apply gentle pressure to push where needed. With the right technique, the components will come free smoothly.
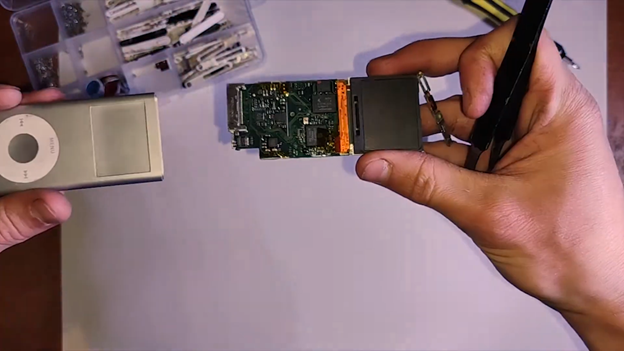
And then voilà, you get the logic board exposed!
Tip: Think of this step as a precision dance—steady hands and the right angle are your secret to success!
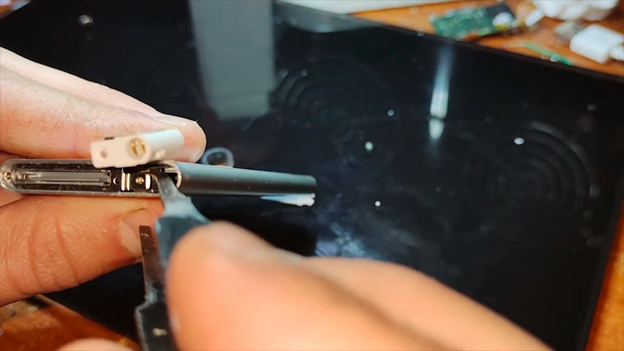
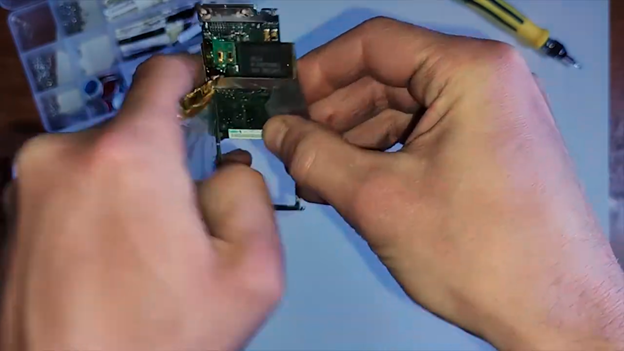
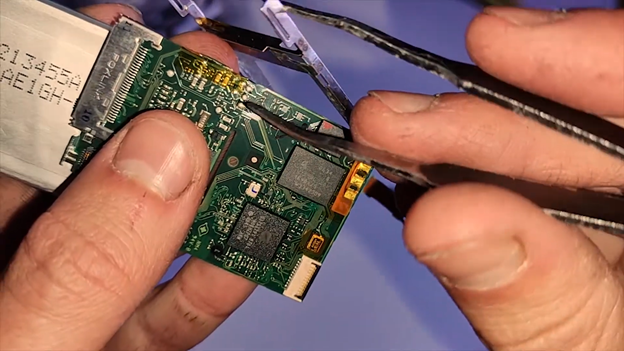
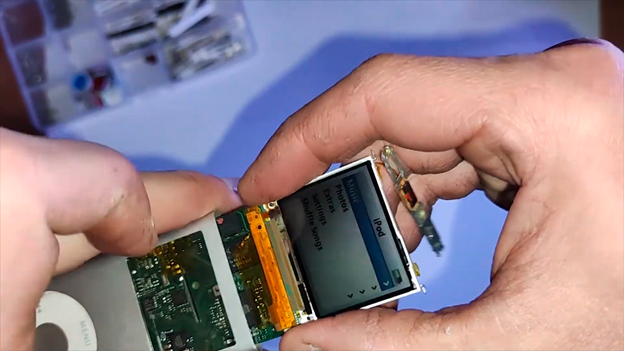
Step 4: Pry Out the Battery and Prepare for Soldering
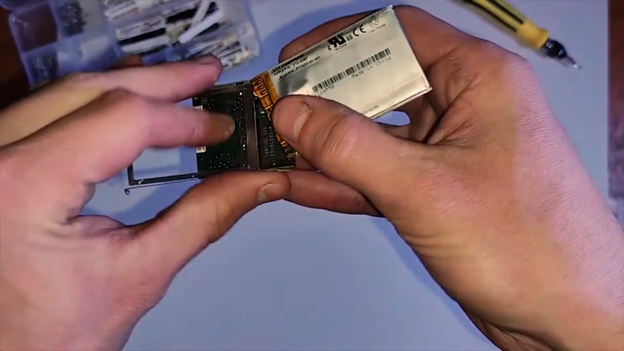
Now that you’ve exposed the logic board, it’s time to remove the old battery. To do that i first recomend to remove the LCD which is just held on with adhesive. Make sure to be careful of the flex cable and disconnect it. Use your metal pry tool to carefully lift the battery out of its compartment. Once it’s free, remove the metal cover protecting the battery. Then, peel off the Kapton tape securing the battery connectors.
This prepares the area for soldering when installing the new battery.
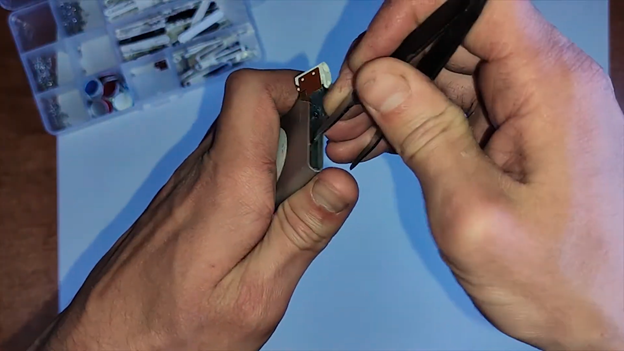
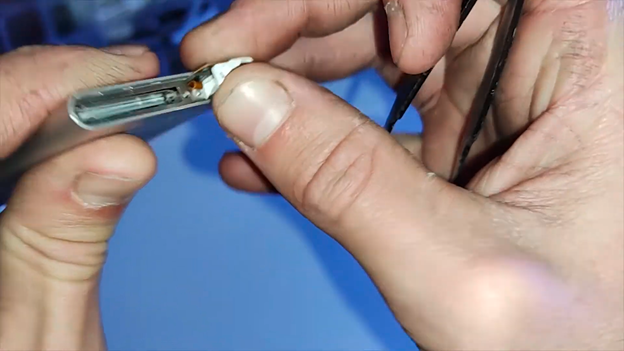
Step 5: Unsolder the Battery and Clean the Board
Grab your soldering iron and carefully unsolder the battery from the logic board. Once the battery is free, use tweezers to remove any leftover mess or debris from the area.
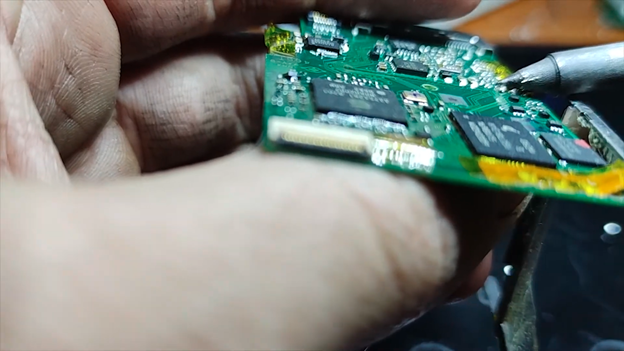
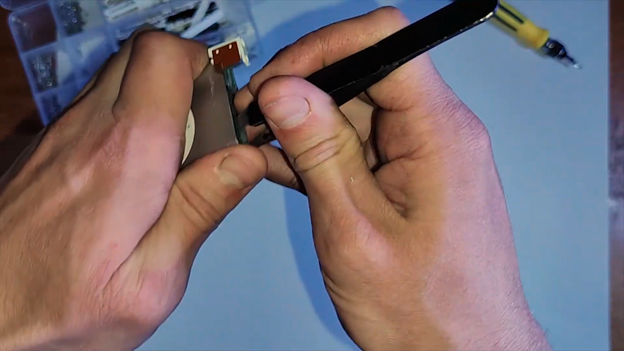
Now, it’s time to clean up! Gently scrape the area with a small tool or the tip of your tweezers. Be cautious—scraping too hard could damage the traces on the board. Move back and forth across the joints until the black residue is cleared away.
Once everything is nice and clean, you’re ready for the next step!
Tip: Patience is key—go slow to avoid damaging the delicate traces. A clean board will ensure a stronger connection for your new battery!

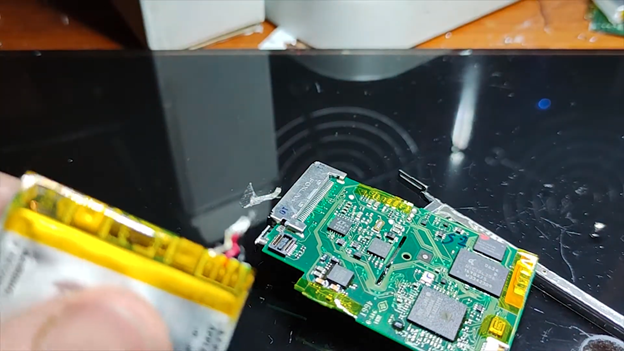
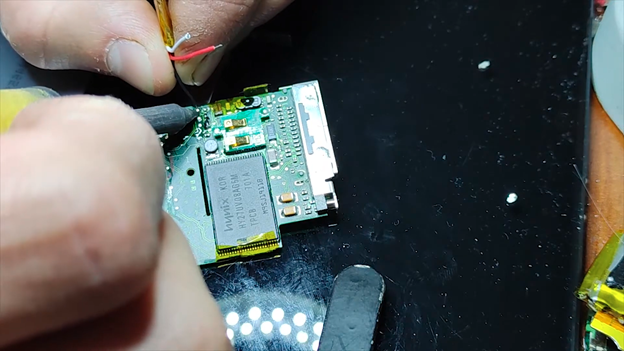
Step 6: Solder the New Battery to the Logic Board
Now that the board is clean, it’s time to solder the new battery into place. Start by applying flux to the solder pads on the logic board. This helps the solder flow more smoothly. Then, add some leaded solder to the pads to make the surface ready for the battery connections.
Next, solder the battery in place. Here’s the wire setup:
The outermost leg is the black wire (negative).
The middle leg is the red wire (positive).
The innermost leg is the white wire.
Take your time to make sure each wire is securely soldered to its corresponding pad.
Tip: Work quickly and carefully—applying too much heat can damage the battery or logic board. A steady hand is your best friend here!

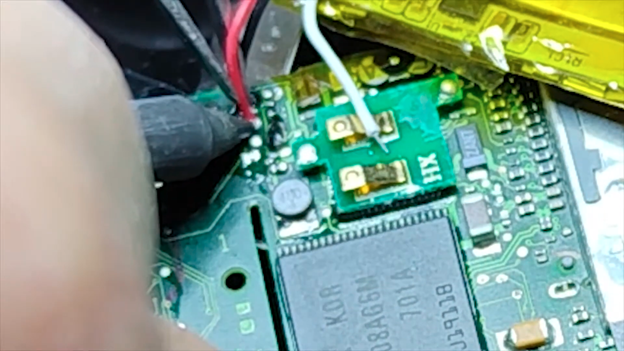
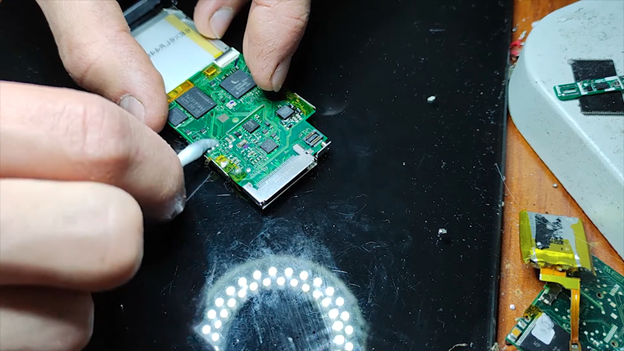
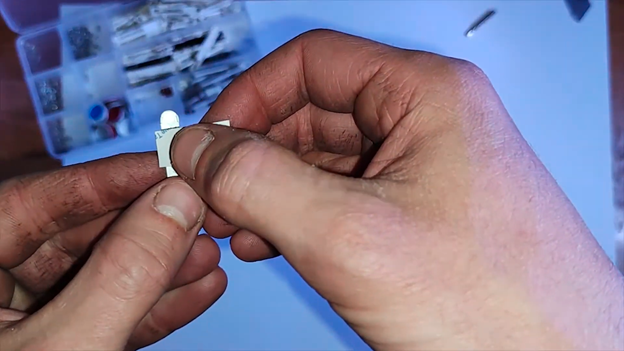
Before moving on to the final assembly, clean up the three legs sticking out at the top of the battery. Apply leaded solder to these legs first to ensure the solder flows all the way through. Sometimes, when you go straight through to the other side, the solder doesn’t fully cover the legs. Once the soldering is complete, cut off the excess legs carefully.
Then, push the wires down so that they’re flush with the surface. This ensures everything fits perfectly when you reassemble the device. Make sure everything is nice, clean, and securely in place for smooth reassembly!
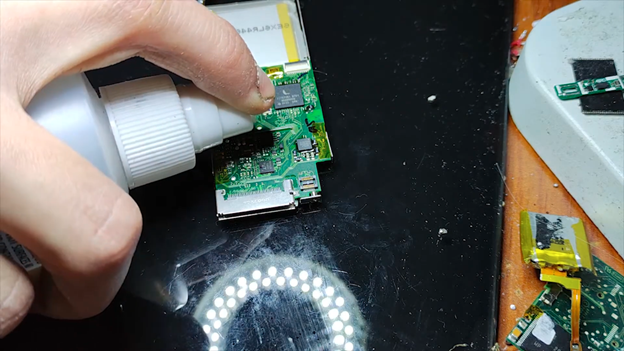
Its also a good idea to clean up the legs using isopropyl alcohol. Once you’ve applied the isopropyl alcohol, give the area a thorough wipe down using cotton buds. This will help reach the smaller areas and ensure that all flux residue is cleaned off. Be gentle but thorough, making sure the board and components are spotless.
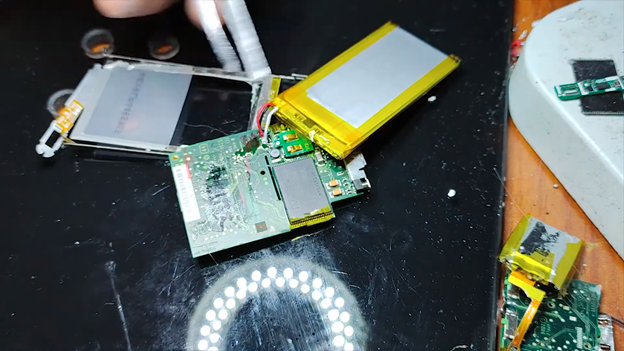
Step 7: Reassemble and Final Check
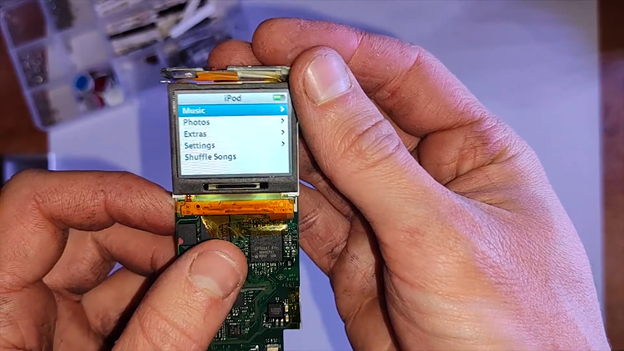
That’s it! Before you put everything back into your iPod, it’s crucial to clean and test the new battery first. Make sure the battery is properly connected and functioning by powering on the device and checking if it’s charging correctly.
Once you’re satisfied everything is working as expected, proceed to carefully reassemble the iPod and enjoy your refreshed device!
Tip: Testing first ensures everything is in order, so you don’t have to take the device apart again later.
After testing, you can carefully place the logic board back into the iPod. Make sure all wires are flush, and gently push the logic board into position until it’s securely seated.
This step ensures everything stays in place for a smooth reassembly. Almost done!
Don’t forget to reconnect the headphone jack! Carefully align it and plug it back into the socket on the logic board. Ensure it’s securely connected before moving on to the next step.
Once the headphone jack is in place, you’re ready to finish the reassembly and enjoy your refreshed iPod!
Once everything is aligned, proceed to reinstall the screws—two at the top and one at the bottom.
After installing the 3 screws, it’s time to reattach the plastic covers. To secure them properly, use double-sided adhesive tape. Carefully cut the tape to match the exact shape of the plastic covers. Once the tape is ready, apply it to the back of each cover. A phone repair specific glue called b7000 can also be used in substitution for double sided tape. However DO NOT use superglue as you wont be able to get the plastic covers off again without breaking them.
Finally, press the plastic covers firmly into place at the top and bottom of the iPod. This will ensure a snug and secure fit, giving your iPod a clean and polished finish. Enjoy your fully functional device!
Before using your iPod, give it a final touch by applying some isopropyl alcohol to a cotton bud or cloth and giving it a good wipe down. This will clean off any remaining residue and leave your device looking as good as new.
And tadaaa! Your iPod is fully refreshed and ready to bring the music back into your life.
If you need to buy a replacement battery for your iPod nano 1st gen you can do so by clicking here. Or alternatively if you think this looked to dificult and you would prefer to send it in and have us repair it for you you can book a mail in repair by clicking here. (we are located in Australia although we accept mail ins worldwide)
Battery: https://partspluspods.com.au/product/apple-ipod-nano-2nd-gen-battery-350mah-a1199/
Screen: https://partspluspods.com.au/product/lcd-screen-for-apple-ipod-nano-2-nd-gen-replacement/
Buttons flex: https://s.click.aliexpress.com/e/_oBY0SJ0
Hello! I replaced the battery following this guide and everything worked perfectly. When in use, I can listen for hours, but if I leave it unused for 3 or 4 days, the battery runs out. Is this normal?