If you’re serious about breathing new life into an old iPod Classic 7th gen— making it wireless and massively upgrading its storage — you’re in the right place.
This guide walks you through doing a Bluetooth mod and upgrading to a 1TB flash storage, along with insider tips you won’t find in the typical modding videos.
This method is based on a lot of trial and error (and a few cooked Bluetooth boards along the way — oops), so follow along carefully!
Let’s Get Started!
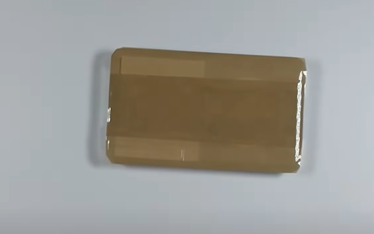
Step 1: Prep the iPod
Before opening, protect the front face:
- Place a small piece of paper over the screen, then lay tape over the paper and rest of the front plate. This prevents accidental scratches or peeling the protective screen layer.
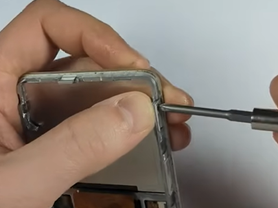
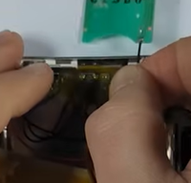
Step 2: Opening the iPod
Skip the iPod pry tools—use a box cutter blade:
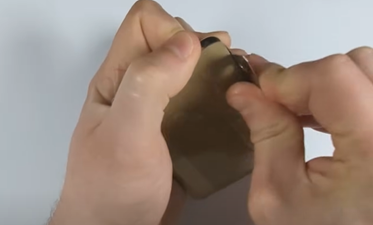
- Start on the bottom-left corner near the hold switch.
- Gently wedge in the blade, twist and lift to unclip the latches along the side.
- Take your time to avoid bending the side rails, which are crucial for clean reassembly.
Pro Tip: Use a second iPod housing or an online image to locate clip positions for safe prying.
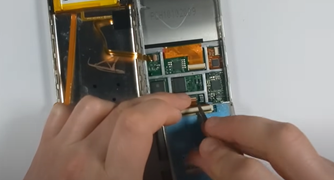
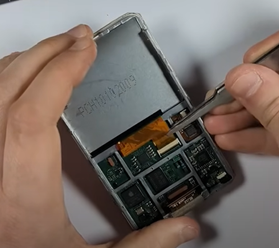
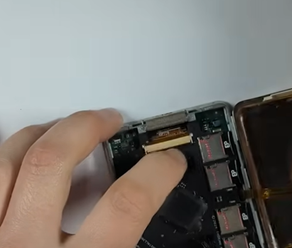
Step 3: Disconnect & Disassemble
With the case open:
- Carefully twist the rear housing aside to access the battery connector.
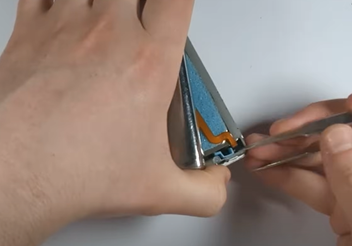
- Disconnect the battery cable gently—this is the most fragile part of the iPod.
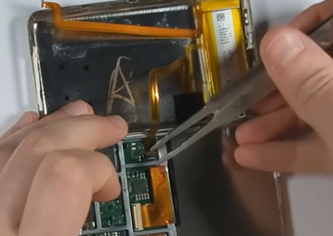
- Remove the hard drive and disconnect its ribbon cable.
- Pull out the two rubber anti-vibration bumpers—not needed for SSDs or SD cards.

- Unplug and unscrew the headphone jack + hold switch assembly (4 screws).
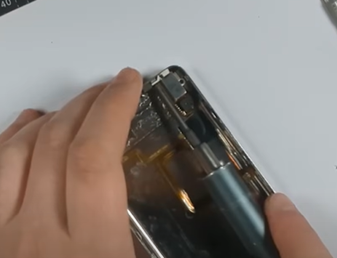
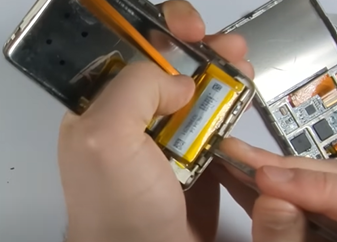
Step 4: Battery Removal
- Soak the old battery with 99% isopropyl alcohol.

- Carefully pry it out, watching for the hold switch cable underneath.
Why alcohol? It loosens the adhesive without damaging the flex cables.
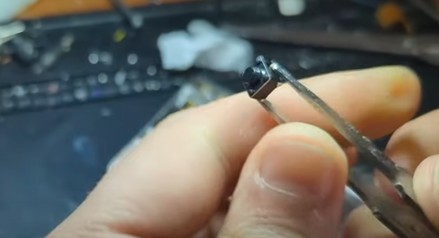
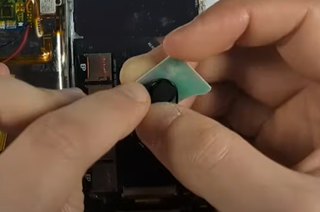
Step 5: Prepare the Headphone Jack
- Remove the clear plastic bump on the flex cable using tweezers or a blade.
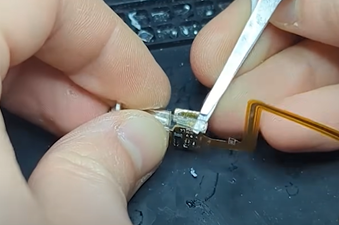
- This avoids the 3,000mAh battery from pinching the flex cable when reassembled. It can potentially cause a tear in it resulting in no audio so make sure not to skip this step.
- Remove the white adhesive base pad from the jack’s underside.

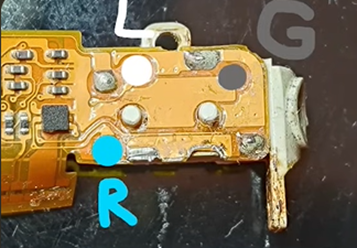
Step 6: Solder Audio Wires to Headphone Jack
Wire up your Bluetooth signal:
- Apply flux to the headphone jack pads.
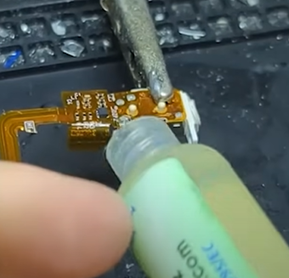
- Solder three wires:
- Right (bottom pad)
- Left (top pad) — use the correct one! One is for signal, the other detects headphone presence.
- Ground (side pad) — wick extra solder to prevent plug fitment issues.
Cut the wires long enough to route to the Bluetooth board comfortably.
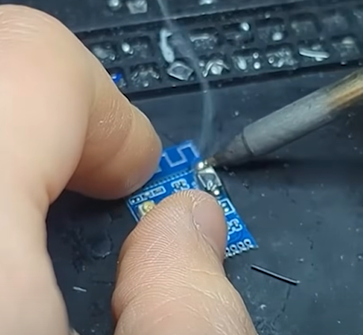
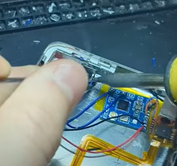
Step 7: Prepare the Bluetooth Board
We’re using the KCX_BT_EMITTER, which is compact and ideal for the slim iPod Classic.
- Remove the push button from the board using your soldering iron and flux.
- Pre-tin the solder pads:
- 5V
- PGND
- L Audio
- R Audio
- Audio Ground
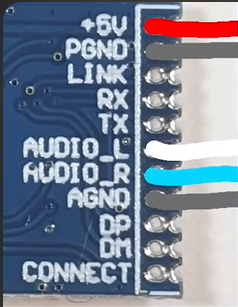
Wire the audio wires (Left, Right, and Ground) to the corresponding pads.
This board likely supports Bluetooth 4.0—not aptX, and not true digital-to-digital. Audio passes through the analog headphone jack first before it’s digitized and transmitted via Bluetooth.
Step 8: Cutting Down the Bluetooth Board
First step: If you’re using a kit that comes with the built-in antenna, you’ll want to modify the Bluetooth board for a cleaner install.
- Why?
Once you cut the built-in antenna off, the Bluetooth board becomes smaller and easier to fit. - How:
- It’s better to unscrew the headphone jack first before cutting.
- Follow the line of perforated holes on the board and cut with scissors.
- Bending it off doesn’t work well — it can damage the board — so just cut it cleanly.
This step does make the installation harder, but it’s worth it if you want a professional finish. (For mail-in repairs, I always do this.)
Step 9: Gluing the Bluetooth Button

Next, we glue the pairing button.
Important tips:
- Use very little superglue — if glue gets into the button mechanism, the button will get stuck and won’t work.
- Hold it in place while drying and add extra glue from the backside afterward for strength.
Pro Tip:
If you mess up, don’t stress. These tiny buttons usually come in multi-packs.
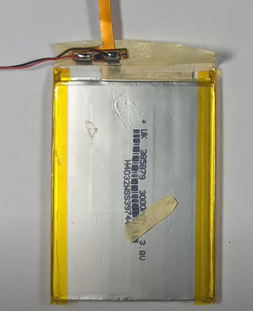
Step 10: Wiring Up the Battery and Button
There are two kinds of 3000mAh batteries for 6th/7th gen iPods:
- Some batteries have clear solder pads on their BMS (battery management system) — these are ideal.
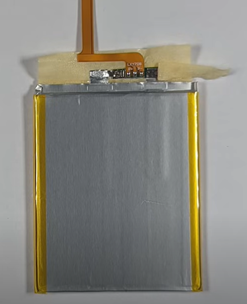
- Others have the BMS attached directly to the battery with a flex cable — less ideal because you have to solder directly onto the battery cell (not great for safety or reliability).
Soldering Order:
- Wire the button first — two thin wires from the original button pads to the new pairing button.
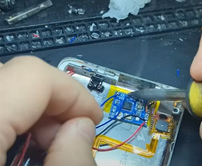
- Wire the battery next — red wire to positive, black wire to negative.

Warning:
Double-check your polarity!
If you accidentally reverse the positive and negative, you’ll fry the Bluetooth board. (No protection circuits!) I’ve done this a few times early on — it’s painful.
Also, put the power switch on the positive lead, NOT the negative.
If you put it on the negative, the Bluetooth board will stay powered through the audio ground wire — and drain your battery.
Step 11: Dealing with Wires and Interference
- Tip: Keep all wires away from the antenna area, especially around the headphone jack.
Running wires over the antenna will ruin your Bluetooth signal and can cause dropouts even with the device just sitting in your pocket.
If you’re noticing poor Bluetooth range or random disconnects, always re-open the iPod and double-check wire placement.
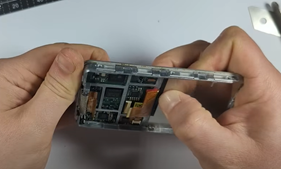
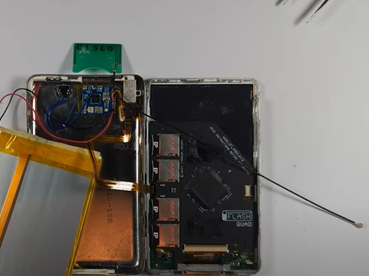
Step 12: Prepping the Front Section: Removing the Metal Plate
Now, we prepare the front of the iPod.
- Why?
Bluetooth doesn’t pass through aluminum very well. That metal shield behind the LCD hurts signal strength.
- How:
- Remove the LCD flex carefully.
- Remove the six screws along the side holding the metal plate.
- Pry the front plate off carefully while keeping pressure on the LCD (so dust doesn’t get under the screen).
You can safely remove this metal shield without affecting how the iPod works.
Pro Tip:
If you lift the LCD even a little, you’ll get dust underneath and spend forever cleaning it.
Always hold the screen down firmly when prying.
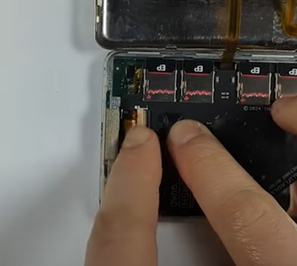
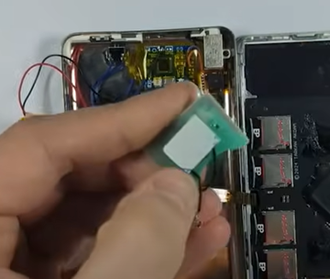
Step 13: Installing the Storage: iFlash Quad + 1TB SD Cards
I’m using an iFlash Quad adapter here.
(If you’re using a 3000mAh battery and want to keep the slim iPod back, the Quad is the only adapter thin enough.)

Compatible setups:
- Slim iPods: Must use iFlash Quad or similar.
- Thick iPods: You can use pretty much any adapter — Quad, Dual, CF, or even green AliExpress adapters.
Recommended SD Cards:
- Best: Samsung Evo or Samsung Pro — the most reliable.
- Okay: Patriot is good and affordable (used it here).
- Avoid: SanDisk — sometimes not compatible with iPods (I’ve seen red X errors even after reformatting).
Tip:
Speed doesn’t matter much once your library is loaded.
Durability matters more if you want your iPod to last years.
Step 14: Mounting the iFlash Quad:
- Plug it into the flex cable.
- Use Kapton tape and double-sided tape to hold it securely.
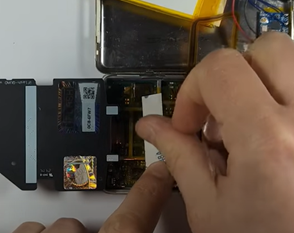
- Bend the flex cable back to avoid the battery crushing it when you close the iPod.
Step 15: Adding an External Antenna (Optional but Recommended)
I added an external Bluetooth antenna from a Nintendo DS Lite.
- Secure the antenna with Kapton tape.
- Use foam padding (like from the iFlash kit) to neatly hold the antenna wire.

- Stick the antenna wire down with double-sided adhesive.

Make sure the antenna doesn’t block the button or headphone jack.
Step 16: Sealing It Up and Testing
Before sealing the iPod:
- Plug the battery connector in.
- Connect to iTunes and restore the iPod to confirm everything works:
- Headphone jack
- Bluetooth
- 1TB storage
Bluetooth pairing process:
- Turn on the Bluetooth board using the lock switch (now your Bluetooth power switch).
- Put your earphones into pairing mode.
- Press the new Bluetooth button — pairing should complete in around 10 seconds.
If everything works, then you can close the iPod up fully!
Bonus Tips:
- If your SD card isn’t detected:
Try reformatting it in Disk Management on your computer. FAT32 or exFAT are usually safe. - If you need to back up your iPod before upgrading:
Use Foobar2000 with the iPod plugin — it’s the best free tool for copying your music.
Final Thoughts
This is definitely an advanced mod, but the result is totally worth it:
- Wireless Bluetooth audio
- Monster battery life
- Up to 1TB of flash storage
You’ll have a truly futureproofed iPod Classic that’s still better than most modern music players.
Take your time, follow the guide carefully, and always double-check everything before closing your iPod.
Good luck and happy modding!
Links to book a mail in bluetooth upgrade service: https://partspluspods.com.au/product/ipod-classic-5th-gen-bluetooth-upgrade/
Links to buy pre made bluetooth rear housing assemblies: https://partspluspods.com.au/product/bluetooth-upgrade-kit-for-apple-ipod-classic-5th-gen/
Links to buy parts featured here (affiliate links):
Bluetooth board: https://s.click.aliexpress.com/e/_ooJalBZ
Antenna: https://s.click.aliexpress.com/e/_onBH6EF
3000mah battery: https://s.click.aliexpress.com/e/_om69n7h
wire: https://s.click.aliexpress.com/e/_onBYrYj
button: https://s.click.aliexpress.com/e/_oCJjzCj
replacement parts:
headphone jack flex: https://s.click.aliexpress.com/e/_opH7t8F
LCD: https://s.click.aliexpress.com/e/_oEzQhqr
front plate: https://s.click.aliexpress.com/e/_oFShOmx
backplate: https://s.click.aliexpress.com/e/_ooqqGhh
click wheel: https://s.click.aliexpress.com/e/_oC6AuyJ
button: https://s.click.aliexpress.com/e/_olI9AdZ
tools and equipment:
soldering iron: https://s.click.aliexpress.com/e/_oDbVMEF
logic board holder: https://s.click.aliexpress.com/e/_ooqorx7
Flux: https://s.click.aliexpress.com/e/_mqIVRSM
Kapton tape: https://s.click.aliexpress.com/e/_okoExqm
older wick: https://s.click.aliexpress.com/e/_om6mjEh
solder: https://s.click.aliexpress.com/e/_EuYYVVj
helping hands tool: https://s.click.aliexpress.com/e/_oCBPwPn
tweezers, get the st-13 and st-14: https://s.click.aliexpress.com/e/_om9mAO5
Earphones: KZ ZSN Pro: https://s.click.aliexpress.com/e/_oEFTtDZ
KZ-AZ09 bluetooth kit: https://s.click.aliexpress.com/e/_onFnjhp
Thank you for the parts!! Appreciate all you do to keep the love alive.