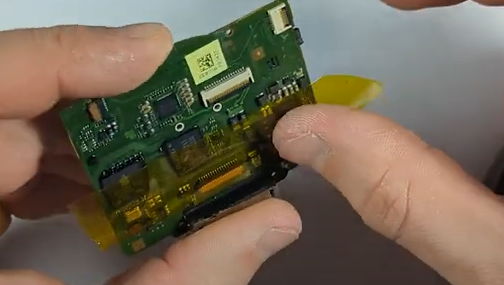
The iPod Classic has become one of the most popular devices to restore and upgrade. Whether you’re adding an iFlash adapter, a larger battery, or simply trying to keep your device alive, one of the most fragile parts you’ll encounter is the battery connector on the logic board.
This tiny piece is notorious for breaking or pulling off entirely during repairs. The good news? It can be fixed—if you know what you’re doing. In this article, we’ll walk through why this happens, the tools you need, and how to replace the connector safely. Or alternatively if you just want me to fix it for you, here is a link to book a mail in repair. You can ship it to me from anywhere in the world and i will get your iPod back up and running again!
Why the Battery Connector Breaks
On the iPod Classic 5th, 6th, and 7th generations, the battery connector is a small plastic and metal assembly soldered directly onto the logic board.
- If you’re lucky, the only damage will be to the plastic latch that holds the ribbon cable. This can be replaced in minutes.
- If the whole connector lifts off the board, you’ll need to solder it back into place.
- If the solder pads are ripped away, the repair becomes advanced and, in most cases, it’s easier to source a replacement logic board.
What You’ll Need (with affiliate links to purchase)
- Fine-tipped, temperature-controlled soldering iron
- hot air rework station (Optional but recommended)
- Flux
- Leaded solder (easier to work with than lead-free)
- Kapton tape (real heat-resistant tape, not the fake stuff that melts)
- Isopropyl alcohol (for cleaning)
- Tweezers
- Solder wick or copper wire
- Logic board holder or stand
- Replacement connector (cheap and easy to find on AliExpress or eBay)
Step 1: Disassemble the iPod
To access the connector, you’ll need to:
- Open the iPod Classic.
- Remove the screws and detach the front plate.
- Unclip the LCD screen.
- Take the logic board out of the chassis.
At this point, you should be working on just the bare logic board.
Step 2: Prepare the Pads
Before soldering:
- Cover nearby components with Kapton tape to protect them from heat.
- Clean the pads with isopropyl alcohol.
- Apply flux generously.
- Re-tin the pads with leaded solder—it melts at a lower temperature, making the process smoother.

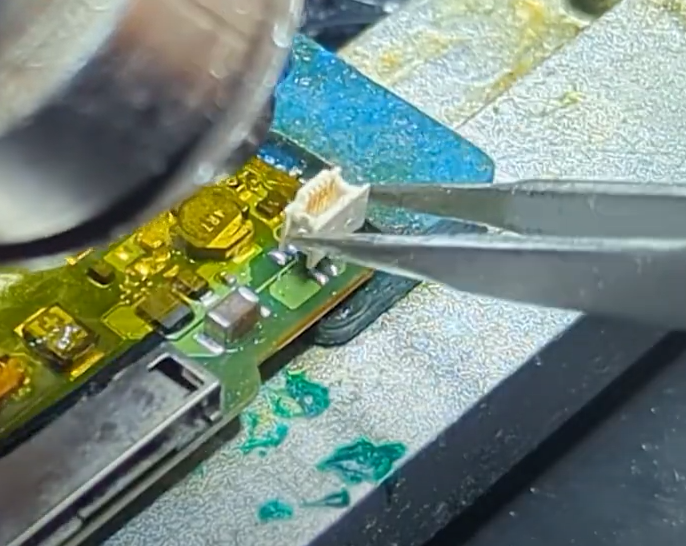
Step 3: Install the Connector
- Hold the replacement connector in place with tweezers.
- If you’re using a hot air rework station, heat the pads until the solder flows, then quickly place the connector before the plastic deforms.
- If you’re using just a soldering iron, carefully tack down each leg. Use thin solder (0.5mm or smaller) to avoid bridging.
Step 4: Inspect and Reinforce
- Check that the connector sits flat and level.
- Gently test each pin with tweezers to ensure it’s solid.
- Add a bit more solder to reinforce the legs—but avoid bridging pins together.
- If you do create a bridge, clean it up with solder wick or copper wire.

All five pins on the iPod Classic connector are active and must be properly soldered.
Step 5: Clean and Reassemble
- Clean off excess flux with isopropyl alcohol.
- Reassemble the iPod carefully.
- Connect the battery and storage to confirm everything works before fully closing the device.
If the iPod boots and recognizes the battery, you’ve successfully restored the connector.
When to Seek Professional Help
If you’ve torn pads off the board or don’t have the right tools, this repair might be too much to tackle at home. In that case, sending your iPod to a professional is the best option.
At PartsPlusPods, I offer mail-in repairs for iPod Classic models, including battery connector replacement. This service typically costs around $70 AUD plus postage (subject to change). If you are interested you can book here. However please note we will only be able to reattach it if the pads are still in tact. If they have been ripped off i would just recommend to get a new logic board.
You can reach me at: contact@partspluspods.com.au
The iPod Classic may be old, but it’s a surprisingly resilient device that can be brought back to life with the right care. Replacing the battery connector is one of the trickiest but most rewarding repairs you can do, especially if you’re also upgrading your iPod with a bigger battery and modern flash storage.
With patience, the proper tools, and a steady hand, you can restore your iPod and keep enjoying it for years to come.